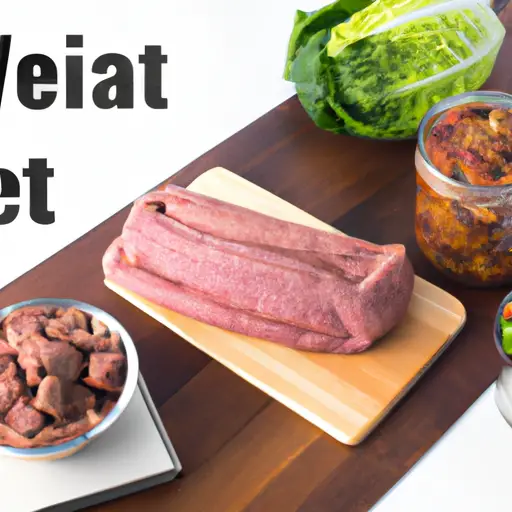
So, you’re interested in off grid living and want to learn about the 10 most effective methods of meat preservation? Well, you’ve come to the right place! Whether you’re a seasoned survivalist or simply curious about sustainable living, knowing how to preserve meat is a valuable skill to have. In this article, we’ll delve into the various methods of meat preservation, from ancient techniques to modern innovations. You’ll definitely find something that suits your needs and preferences.
Now, let’s talk about the 10 methods of meat preservation. First up, we have drying. This is one of the oldest and simplest methods, where meat is air-dried until most of the moisture is removed. Then, there’s smoking, which not only adds flavor but also helps to deter insects and bacteria. Curing is another popular method, involving the use of salt and other ingredients to preserve meat. And of course, there’s canning, a reliable method that involves sealing meat in airtight jars or cans.
But wait, there’s more! We’re just scratching the surface here. In addition to the methods I’ve mentioned, you’ll also learn about salting, brining, fermenting, and freezing. Each method has its own advantages and disadvantages, so it’s important to choose the one that best suits your circumstances. So, get ready to dive deeper into the fascinating world of meat preservation and discover the techniques that will ensure your meat stays fresh and safe, no matter where you find yourself.

Canning
Introduction to canning
Canning is a popular method of meat preservation that involves sealing meat in jars or cans and heating them to destroy microorganisms. This process helps extend the shelf life of meat, allowing it to be stored for long periods without the need for refrigeration.
Equipment required for canning
To can meat, you will need the following equipment:
- Pressure canner: This is a crucial tool for canning meat safely, as it allows you to achieve the high temperatures necessary to kill any bacteria or spores that may be present.
- Canning jars: These glass jars are designed to withstand the heat of the canning process. They come in different sizes to accommodate various amounts of meat.
- Jar lifter: This tool makes it easier to remove hot jars from the canner safely.
- Canning funnel: This funnel helps you fill the jars without any spills or mess.
- Lid lifter: This magnetized tool helps you lift the canning lids without touching them directly.
- Air bubble remover: This tool helps remove any trapped air bubbles from the jar before sealing it.
Steps to can meat
- Prepare the meat: Start by selecting fresh, high-quality meat and trim off excess fat. Cut the meat into pieces that will fit comfortably inside the canning jars.
- Season the meat (optional): You can marinate the meat or add spices and herbs to enhance its flavor.
- Pack the jars: Fill the jars with the meat, leaving appropriate headspace as per your canner’s instructions.
- Close the jars: Place the lids and bands on the jars, ensuring they are tightened securely.
- Process the jars: Place the jars in the pressure canner and follow the manufacturer’s instructions for processing times and pressure levels.
- Cool and test the seals: After canning, allow the jars to cool completely. Test the seals by pressing the center of the lids. If they do not move or pop, the jars are properly sealed.
- Store the canned meat: Label the jars with the date and store them in a cool, dark place. Canned meat can typically be stored for up to one year.
Smoking
Introduction to smoking meat
Smoking is a traditional method of meat preservation that involves exposing meat to smoke from burning wood or other aromatic materials. This process imparts a unique smoky flavor to the meat and helps preserve it by inhibiting the growth of bacteria.
Types of smokers
There are several types of smokers available, depending on your specific needs and preferences:
- Charcoal smokers: These smokers use charcoal as the fuel source and typically require the addition of wood chips or chunks to produce smoke.
- Electric smokers: These smokers are easy to use and maintain, as they rely on electricity to generate both heat and smoke. They eliminate the need for constant monitoring of fuel levels.
- Propane smokers: Propane smokers use propane gas as the heat source. They offer precise temperature control and are suitable for both beginners and experienced users.
- Pellet smokers: These smokers use wood pellets made from compressed sawdust to generate smoke and heat. They have automated systems that control temperature and smoke production.
Steps to smoke meat
- Choose the right wood: Different woods impart different flavors to the meat. Popular options include hickory, mesquite, apple, cherry, and oak. Soak the wood chips or chunks in water for about 30 minutes before using them in the smoker.
- Prepare the meat: Trim excess fat and season the meat with your choice of spices, rubs, or marinades.
- Preheat the smoker: Follow the manufacturer’s instructions to preheat your smoker to the desired temperature.
- Add wood chips: If using a charcoal, electric, or propane smoker, add the soaked wood chips to the smoker box or directly onto the heat source.
- Place the meat in the smoker: Arrange the meat on the cooking grates, leaving enough space between the pieces for the smoke to circulate.
- Monitor the temperature: Maintain a consistent temperature throughout the smoking process, typically between 225°F and 250°F (107°C and 121°C).
- Continue smoking: Smoke the meat until it reaches the desired internal temperature. This will vary depending on the type and cut of meat. Use a meat thermometer to ensure it is safe to eat.
- Rest and serve: Allow the smoked meat to rest for a few minutes before serving to allow the juices to redistribute.
Salting
Introduction to salting meat
Salting is one of the oldest methods of meat preservation. It involves coating meat with salt, which draws out moisture, inhibits bacterial growth, and adds flavor to the meat. Salting can be done either through dry salting or brining.
Types of salt used
- Kosher salt: Kosher salt is a coarse-grained salt that is commonly used for salting meat. It has no additives, making it ideal for preserving meat.
- Sea salt: Sea salt is obtained by evaporating seawater. It comes in various grain sizes and can also be used for salting meat.
- Curing salt: Curing salt, also known as Prague powder or pink salt, contains sodium nitrite. It is commonly used for curing and preserving meat, particularly in processed meats like bacon and ham.
Steps to salt meat
Dry salting
- Prepare the meat: Trim and clean the meat, removing any excess fat or bones.
- Apply the salt: Rub kosher or sea salt all over the meat’s surface, covering it evenly. Use approximately 1 tablespoon of salt per pound of meat.
- Rest and refrigerate: Place the salted meat on a wire rack, allowing any excess moisture to drain. Refrigerate the meat for several hours or overnight, depending on its size and thickness.
- Rinse and dry: After the designated time, rinse the meat thoroughly to remove excess salt. Pat it dry with paper towels.
- Hang and air dry: Hang the meat in a cool, well-ventilated space, ensuring it is protected from insects. Allow it to air dry for several weeks or until it achieves the desired texture.
Brining
- Prepare the brine: In a container, dissolve salt in water, along with any desired additional ingredients such as sugar, herbs, or spices. Use approximately 1 cup of salt per gallon of water.
- Submerge the meat: Place the meat in the brine, ensuring it is fully submerged. You can use a plate or weight to keep the meat submerged.
- Refrigerate and brine: Refrigerate the container with the meat and brine for the recommended length of time, depending on the meat’s thickness and desired saltiness.
- Remove and rinse: After brining, remove the meat from the brine and rinse it thoroughly to remove any excess saltiness.
- Dry and store: Pat the meat dry with paper towels and store it in a cool, dry place. Use refrigeration if necessary.

Freezing
Introduction to freezing meat
Freezing is a widely used method of meat preservation that involves lowering the temperature of meat to below freezing point, effectively halting the growth of microorganisms and extending its shelf life. Proper freezing techniques are essential to maintain the quality and safety of the meat.
Best practices for freezing
To ensure the best quality and safety of frozen meat, follow these practices:
- Use fresh meat: Freeze meat as soon as possible after purchasing or butchering to maintain its quality.
- Package properly: Use freezer-safe containers, bags, or vacuum-sealed pouches to prevent freezer burn and protect against air and moisture.
- Label and date: Clearly label the packages with the type of meat and the date of freezing to ensure proper rotation and identification.
- Remove excess air: When using bags or vacuum-sealed pouches, remove as much air as possible to prevent freezer burn.
- Maintain proper temperature: Keep your freezer at or below 0°F (-18°C) to ensure the meat remains frozen solid.
- Use safe thawing methods: Thaw meat in the refrigerator, in cold water, or using the defrost function of a microwave. Avoid thawing at room temperature to prevent bacterial growth.
Thawing meat correctly
Thawing meat correctly is essential to ensure food safety and preserve the quality of the meat. Here are the recommended thawing methods:
- Refrigerator thawing: Place the frozen meat on a plate or in a container to catch any drips and thaw it in the refrigerator. This is the safest method but requires planning ahead, as it can take several hours to several days depending on the size of the meat.
- Cold water thawing: If you need to thaw meat quickly, you can place it in a leak-proof plastic bag and submerge it in cold water. Change the water every 30 minutes to maintain a safe temperature. Be sure to cook the meat immediately after thawing using this method.
- Microwaving: Use the defrost function on your microwave to safely thaw small cuts of meat. Follow the manufacturer’s instructions for defrosting times and power levels. Be prepared to cook the meat immediately after thawing to prevent bacterial growth.
Drying
Introduction to drying meat
Drying, also known as dehydration, is a method of meat preservation that involves removing moisture from the meat to inhibit the growth of bacteria, molds, and yeasts. Drying meat also concentrates its flavor, making it a delicious and lightweight option for long-term storage.
Different methods of drying
- Air drying: This traditional method involves hanging meat strips or small pieces in a cool, well-ventilated area. The process can take several days to weeks, depending on the ambient conditions.
- Oven drying: If you don’t have access to outdoor drying space, you can use a home oven set to a low temperature (around 140°F or 60°C) to dry meat. Place the meat on a wire rack in the oven, leaving the door slightly ajar to allow moisture to escape.
- Dehydrator drying: Food dehydrators are specially designed for drying a variety of foods, including meat. Follow the manufacturer’s instructions for temperature settings and drying times.
Tips for dehydrating meat
- Prepare the meat: Trim the meat and cut it into thin, uniform slices or strips for even drying.
- Season the meat: Before drying, you can add flavor to the meat by marinating it in your desired mixture of spices, herbs, and liquids. This will enhance the flavor of the final product.
- Arrange the meat: Place the meat slices or strips in a single layer on drying racks or trays, ensuring they are not touching each other. This allows for proper airflow and even drying.
- Monitor the drying process: Check the meat regularly for dryness by pressing it with your fingers. It should feel firm and bendable but not moist or sticky.
- Store properly: Once the meat is dried to your desired texture, allow it to cool completely before storing it in airtight containers or vacuum-sealed bags. Store the dried meat in a cool, dark place to extend its shelf life.
Pickling
Introduction to pickling meat
Pickling is a preservation method that involves preserving meat in a pickling solution, which is typically made of vinegar, salt, and various spices and seasonings. This process not only extends the shelf life of the meat but also adds a tangy, flavorful taste to it.
Pickling brines and solutions
To pickle meat, you need to prepare a pickling brine or solution. Here is a basic recipe for a pickling solution:
- 1 cup water
- 1 cup vinegar (white vinegar, apple cider vinegar, or malt vinegar can be used)
- 1 tablespoon salt
- 1 tablespoon sugar
- Optional: spices and herbs like garlic, peppercorns, bay leaves, and chili flakes for added flavor
Combine all the ingredients in a saucepan and bring to a boil. Let the brine cool completely before using it to pickle meat.
Steps to pickle meat
- Prepare the meat: Trim the meat into desired portions and remove any excess fat.
- Season the meat (optional): Season the meat with your choice of spices, herbs, or marinades for added flavor.
- Place the meat in jars: Pack the meat tightly into sterilized jars, leaving sufficient headspace at the top.
- Pour the pickling solution: Fill the jars with the cooled pickling solution, ensuring the meat is completely covered. Leave about half an inch of headspace.
- Remove air bubbles: Use a knife or skewer to remove any air bubbles trapped inside the jars.
- Seal the jars: Place sterilized lids and rings on the jars and tighten them securely.
- Process the jars (optional): If you prefer long-term storage at room temperature, you can process the jars in a water bath canner or a pressure canner according to the appropriate guidelines.
- Store and cure: Store the pickled meat in a cool, dark place for at least a few days to allow the flavors to develop fully. It can typically be stored for several months.
Curing
Introduction to curing meat
Curing is a method of meat preservation that involves treating meat with a combination of salt, sugar, and other curing agents to inhibit bacterial growth, prevent spoilage, and enhance flavors. This method is commonly used for long-term preservation of meats like ham, bacon, and sausages.
Different curing agents
- Salt: The primary curing agent, salt draws out moisture from the meat, inhibiting bacterial growth and preserving the meat.
- Sugar: Sugar adds flavor and helps balance the salty taste. It also promotes caramelization and adds a pleasing color to the meat.
- Nitrites and nitrates: These compounds help prevent the growth of harmful bacteria, improve flavor, and preserve the pink color of cured meats. However, their use must be regulated, and it is important to follow guidelines for safe usage.
Curing process and timings
The curing process involves applying a dry or wet cure to the meat and allowing it to cure for a specific period. Here is a general outline of the curing process:
- Prepare the meat: Trim the meat and remove any bones or excess fat.
- Apply the cure: Determine the amount of cure needed based on the weight of the meat and follow the instructions for the specific curing recipe. Rub the cure mixture thoroughly into the meat, ensuring even coverage.
- Rest and refrigerate: Place the cured meat in a container or a sealable plastic bag and refrigerate it. Allow the meat to rest and cure for the recommended time, usually several days to weeks. Flip or massage the meat every few days to distribute the cure evenly.
- Rinse and dry: After the curing period, rinse the meat under cold running water to remove excess salt or cure. Pat it dry with paper towels.
- Optional smoking: If desired, you can further enhance the flavors by smoking the cured meat according to the smoking method outlined earlier.
- Store and age: Once the curing and optional smoking processes are complete, store the meat in a cool, dark place to age. This allowing it to develop flavor and texture. The aging process can take several weeks to months, depending on the specific meat and desired results.
Fermentation
Introduction to fermented meat
Fermentation is a unique method of meat preservation that involves encouraging the growth of beneficial bacteria and yeasts to convert sugars in the meat to lactic acid. This acidification process inhibits the growth of harmful bacteria and greatly prolongs the storage life of the meat.
Types of fermentation
- Dry fermentation: In dry fermentation, meat is typically salted and left to ferment at controlled temperature and humidity levels. This process helps develop a characteristic tangy flavor and texture.
- Wet fermentation: Wet fermentation involves immersing the meat in a brine or solution, promoting the growth of beneficial bacteria and yeasts. This method is commonly used for fermenting sausages like salami.
Steps to ferment meat
- Prepare the meat: Trim the meat and remove any bones or excess fat. Cut the meat into small pieces or grind it depending on the desired end product.
- Add starter culture (optional): To facilitate fermentation, you can add a starter culture or specific strains of beneficial bacteria to the meat. This helps ensure a controlled and safe fermentation process.
- Season the meat: Add salt, spices, and other desired flavorings to the meat. Mix them thoroughly to ensure even distribution.
- Allow fermentation: Place the seasoned meat in a fermentation container or casing, ensuring there is enough space for the meat to expand during fermentation. Seal or cover the container to create an anaerobic environment.
- Control temperature and humidity: Ferment the meat at a controlled temperature and humidity, typically around 50°F to 70°F (10°C to 21°C). This encourages the growth of beneficial bacteria and yeasts while inhibiting the growth of harmful ones.
- Monitor and test the fermentation: Regularly check the meat for changes in texture, aroma, and taste. The fermentation process can take several days to weeks, depending on the specific recipe and desired outcome.
- Age and dry (optional): After fermentation, the meat can be further aged and dried in a controlled environment if desired.
- Store and enjoy: Once the fermentation and optional aging processes are complete, store the fermented meat in a cool, dark place. It can usually be stored for several months.
High-pressure Processing
Explanation of high-pressure processing
High-Pressure Processing (HPP) is a modern method of meat preservation that uses high levels of hydrostatic pressure to kill bacteria, molds, and yeasts. This process preserves the quality of the meat while extending its shelf life.
Benefits and drawbacks of HPP
HPP offers several advantages in meat preservation:
- Food safety: HPP effectively kills harmful pathogens such as Salmonella, E.coli, and Listeria, ensuring that the meat is safe for consumption.
- Extended shelf life: By destroying microorganisms, HPP extends the shelf life of meat, reducing the need for conventional preservatives or refrigeration.
- Quality retention: HPP preserves the fresh-like texture, color, and taste of meat, resulting in a high-quality end product.
However, there are some drawbacks to consider:
- Cost: HPP equipment and processes can be expensive, making it less accessible for small-scale or home-based meat preservation.
- Limited impact on spores: While HPP effectively kills vegetative microorganisms, it has limited impact on bacterial spores that can withstand high pressures.
Safety considerations
When using HPP for meat preservation, it is crucial to observe the following safety considerations:
- Process control: Monitor and control the pressure, temperature, and time parameters according to the specific meat and product being processed.
- Packaging integrity: Use appropriate packaging materials that can withstand the high pressure and prevent leaks or ruptures.
- Post-processing handling: Handle HPP-treated meat with care to avoid recontamination. Maintain good hygiene practices during storage, transportation, and handling.
Conclusion
In conclusion, there are various methods of meat preservation, each offering unique benefits and flavors. From canning and smoking to salting and freezing, these methods allow you to extend the shelf life of meat while retaining its quality and taste. Whether you prefer the tangy flavors of pickled meat or the intense smokiness of smoked meat, there is a preservation method to suit your preferences. Experiment with these techniques to discover your favorite ways to preserve and enjoy meat for extended periods. Remember to follow safe practices and adhere to recommended guidelines to ensure food safety at all times.