Hello there! In this article, we’ll discuss how to fill a raised bed with soil for gardening. We’ll explore the steps involved in properly filling your raised bed to ensure healthy plant growth. Whether you’re new to gardening or looking for some tips, this article will guide you through the process. So, let’s get started and find out if you can fill a raised bed with just soil.
How to Fill a Raised Bed with Soil for Gardening
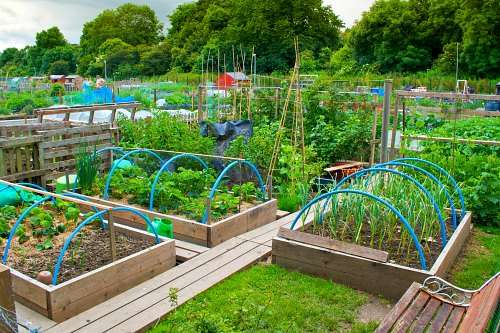
If you’re an avid gardener or are interested in starting a garden, you may have come across the idea of using raised beds. Raised beds offer numerous advantages over traditional gardening methods, including improved drainage, better soil quality, and protection from pests and weeds. But how do you go about filling a raised bed with soil? In this article, we will guide you through the process step by step, ensuring that you create a healthy and productive growing environment for your plants.

Advantages of Using Raised Beds
Before we dive into the process of filling a raised bed with soil, let’s first discuss the advantages of using raised beds for gardening.
Improved Drainage and Aeration
One of the primary benefits of raised beds is improved drainage and aeration. By elevating the soil, raised beds allow excess water to drain away more efficiently, preventing waterlogged roots and reducing the risk of root rot. Additionally, the loose and well-draining soil in raised beds ensures proper aeration, allowing plant roots to access oxygen and nutrients more effectively.
Better Soil Quality and Fertility
Raised beds provide an opportunity to create the perfect soil environment for your plants. You have control over the soil composition, allowing you to choose high-quality topsoil and incorporate organic matter such as compost. This improves soil fertility and structure, providing your plants with the necessary nutrients and creating an ideal growing medium.
Protection from Pests and Weeds
Another advantage of using raised beds is the protection it offers against pests and weeds. The elevated height of raised beds makes it more challenging for pests like slugs and snails to reach the plants. Additionally, by using a weed barrier or liner at the bottom of the raised bed, you can prevent weeds from encroaching on your plants’ space, reducing the need for regular weeding.
Now that we understand the benefits of raised beds let’s move on to the steps involved in filling one with soil.
Choosing the Right Location for Your Raised Bed
Before you fill your raised bed with soil, it’s essential to choose the right location for it. Consider the following factors:
Considering Sunlight Exposure
Most plants require at least six hours of direct sunlight each day. Therefore, it’s crucial to select a location for your raised bed that receives adequate sunlight. Observe your garden throughout the day and identify areas with the most sun exposure. This will ensure that your plants thrive and produce bountiful harvests.
Access to Water Source
Your raised bed will need a reliable water source for proper irrigation. Ensure that the location you choose is near a water source, such as an outdoor faucet or rainwater harvesting system. This will make watering your plants more convenient and efficient.
Level Ground and Proper Drainage
Ensure that the ground where you plan to place your raised bed is level to prevent soil erosion and water pooling. Additionally, assess the area’s drainage to avoid any issues with excess water accumulation, which could harm your plants’ roots.
Distance from Trees and Large Plants
When choosing the location for your raised bed, consider its proximity to trees and large plants. These can compete with your plants for nutrients, water, and sunlight, reducing their growth and productivity. Ideally, your raised bed should be at least six feet away from any large plants to ensure their optimal development.
Once you have selected the perfect location for your raised bed, it’s time to gather the materials needed to fill it with soil.

Materials Needed to Fill a Raised Bed
To create a suitable growing environment in your raised bed, you will need the following materials:
Quality Topsoil
Start by acquiring high-quality topsoil for your raised bed. Look for soil that is rich in organic matter and free from contaminants. Good topsoil will provide a solid foundation for your plants’ root systems and contribute to their overall health and vitality.
Compost or Organic Matter
Incorporating compost or other organic matter into your soil mixture is essential for enhancing its fertility and improving its structure. Compost adds vital nutrients to the soil and helps retain moisture, promoting healthy plant growth.
Soil Amendments for Specific Needs
Depending on the specific needs of your plants, you may need to include soil amendments in your raised bed. These could include products like lime to adjust the soil pH, bone meal for phosphorus supplementation, or blood meal for nitrogen enrichment. Conduct a soil test to determine the requirements of your plants and add amendments accordingly.
Mulching Materials
Lastly, you will need mulching materials to cover the surface of your raised bed. Mulch helps retain moisture, regulates soil temperature, and suppresses weed growth. Organic mulches, such as straw, wood chips, or shredded leaves, are ideal options.
Now that you have gathered your materials, let’s move on to calculating the amount of soil required for your raised bed.
Calculating the Amount of Soil Required
To ensure that you have enough soil to fill your raised bed, you need to calculate the volume required. Follow these steps:
Determining the Dimensions of Your Raised Bed
Measure the length, width, and height of your raised bed in feet. Record these measurements accurately for the next step.
Calculating the Volume in Cubic Feet
Multiply the length, width, and height of your raised bed to calculate the volume in cubic feet. For example, if your raised bed measures 4 feet long, 2 feet wide, and 1 foot high, the calculation would be as follows: 4 feet x 2 feet x 1 foot = 8 cubic feet.
Converting Cubic Feet to the Required Amount of Soil
To convert the cubic feet measurement to the required amount of soil, consider the depth you want to fill your raised bed. Typically, a depth of 6 inches to 1 foot is sufficient. Multiply the volume in cubic feet by the depth in feet to get the final measurement. Using the previous example, if you want to fill your raised bed to a depth of 8 inches (0.67 feet), the calculation would be: 8 cubic feet x 0.67 feet = 5.36 cubic feet of soil.
Now that you have calculated the amount of soil required let’s move on to the preparation of the raised bed.

Preparing the Raised Bed for Soil
Before filling your raised bed with soil, a few essential steps need to be taken to prepare the bed adequately:
Weeding and Removing Existing Vegetation
Clear the area where the raised bed will be placed from any existing vegetation or weeds. Use a garden rake or hoe to remove weeds and loosen the soil beneath.
Loosening and Aerating the Soil Beneath
Use a garden fork or tiller to loosen and aerate the soil beneath the raised bed. This will provide an opportunity for the plant roots to penetrate deeper and access additional nutrients and moisture.
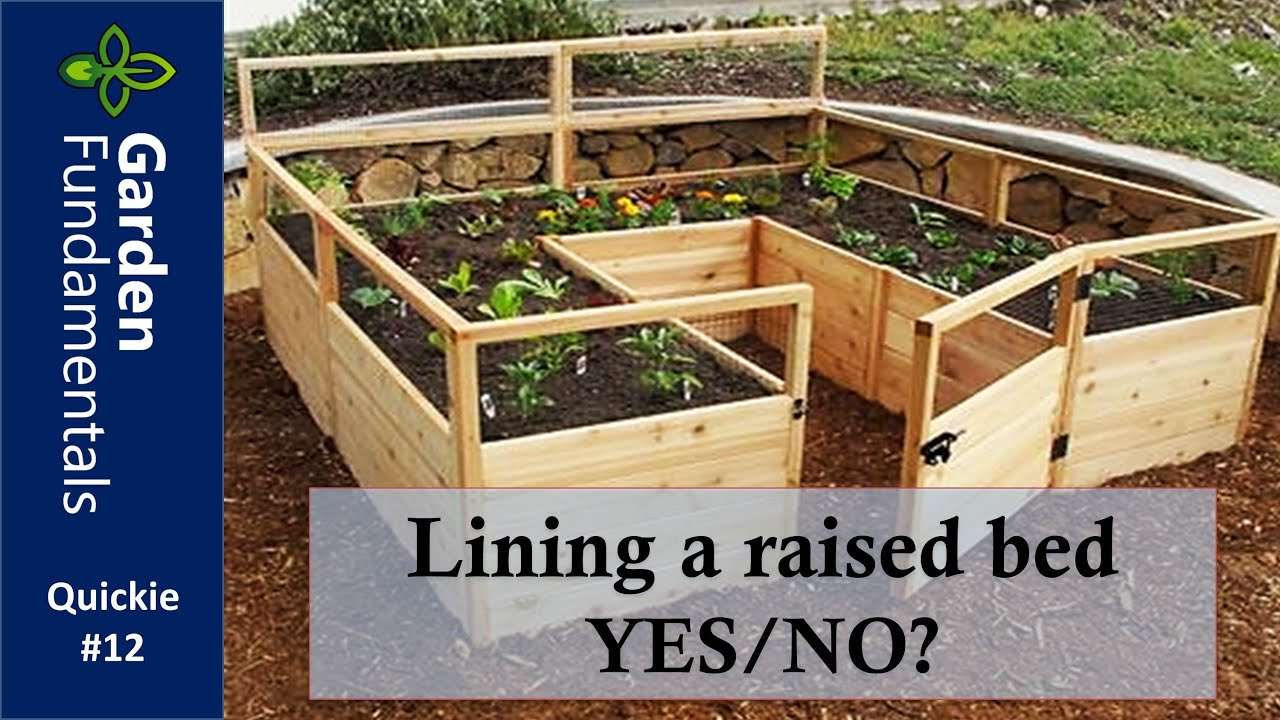
Installing Necessary Barriers or Liners
If you are concerned about weed growth, you can install a weed barrier or liner at the bottom of your raised bed. This will help prevent weeds from growing upward from the ground into your raised bed.
Creating a Level Base
Ensure that your raised bed sits on a level base to provide stability and prevent any issues with water pooling. Use a level or a straight board to check the base’s levelness and make any necessary adjustments.
Once your raised bed is adequately prepared, it’s time to fill it with soil.
Layering the Soil in the Raised Bed
To create a nutrient-rich soil environment for your plants, you need to layer the soil in your raised bed. Follow these steps:
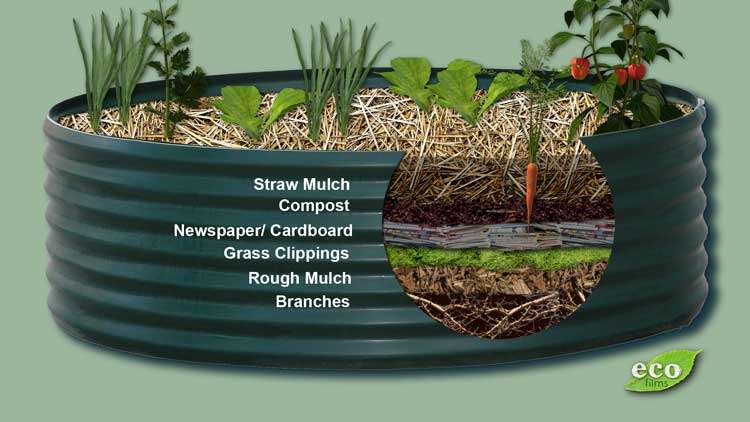
Adding a Layer of Organic Matter at the Bottom
Start by adding a layer of compost or other organic matter at the bottom of your raised bed. This will act as a nutrient-rich base and help improve soil fertility.
Applying a Layer of Quality Topsoil
On top of the layer of organic matter, evenly distribute a layer of quality topsoil. Make sure to fill the raised bed at least halfway with soil to provide ample space for the plant roots to grow.
Incorporating Soil Amendments as Needed
If you conducted a soil test and identified specific nutrient deficiencies or pH imbalances, now is the time to incorporate the necessary soil amendments. Mix the amendments into the top layer of soil evenly.
Adding Additional Layers of Compost and Topsoil
Continue layering your raised bed with compost and topsoil until it is filled to the desired depth. Ensure that each layer is evenly spread and firmly packed to provide stable support for your plants.
With the soil in place, it’s essential to water and settle it before proceeding.

Watering and Settling the Soil
After filling your raised bed with soil, it’s crucial to water it thoroughly. Follow these steps:
Watering the Soil Thoroughly
Using a watering can or garden hose, thoroughly water the soil in your raised bed. Ensure that the water penetrates deep into the soil, ensuring proper moisture throughout.
Allowing the Soil to Settle and Compact Naturally
Let the soil settle and compact naturally for a few days before planting. During this time, the soil may settle and form depressions. If this happens, add more soil to level it out.
Adding More Soil if Necessary
If you notice any significant settling or depressions after a few days, add more soil to fill these areas. It’s essential to have an even surface to ensure proper plant growth.
Watering Again to Ensure Proper Moisture
After leveling the soil and adding any necessary amendments, water the raised bed again to ensure that the soil is adequately moist. This will allow your plants to establish their root systems successfully.
Once your raised bed soil is settled and properly hydrated, it’s time to apply mulch.
Mulching the Raised Bed
Mulching your raised bed offers several benefits and helps maintain a healthy growing environment for your plants. Follow these steps to mulch your raised bed:
Choosing the Right Mulching Material
Select a mulching material that suits your preferences and the specific needs of your plants. Organic mulches like straw, wood chips, or shredded leaves are excellent options as they break down over time, enriching the soil.
Applying a Layer of Mulch to Retain Moisture
Evenly spread a layer of mulch over the surface of your raised bed. Aim for a thickness of around 2-3 inches. Mulch helps retain moisture in the soil, reducing the need for frequent watering.
Preventing Weed Growth and Regulating Soil Temperature
Mulch serves as a natural weed barrier, suppressing weed growth and reducing competition for nutrients and space. Additionally, it helps regulate soil temperature, keeping the soil cooler in hot weather and warmer in cool weather.
Maintaining the Mulch Layer Over Time
Monitor the mulch layer regularly and replenish it as needed. Over time, the mulch breaks down and decomposes, so it’s essential to add fresh mulch periodically to maintain its effectiveness.
Now that your raised bed is filled with soil and mulched, it’s time to start planting.

Planting in the Raised Bed
When planting in your raised bed, consider the following factors:
Choosing Appropriate Plants for Your Raised Bed
Select plants that are suitable for your raised bed’s growing conditions, such as sunlight exposure and soil type. Research the specific requirements of the plants you wish to grow and choose accordingly.
Spacing and Arrangement of Plants
Ensure proper spacing between your plants to allow for adequate airflow and prevent overcrowding. Follow the spacing recommendations provided on seed packets or plant labels.
Proper Planting Techniques
Use proper planting techniques when transplanting or sowing seeds in your raised bed. Dig a hole wide enough for the plant’s roots, gently place the plant in the hole, and backfill with soil. Lightly tamp the soil to remove any air pockets and ensure good root-to-soil contact.
Establishing a Watering and Maintenance Routine
Establish a watering and maintenance routine for your raised bed. Monitor the soil moisture regularly and water as needed. Additionally, remove any weeds or pests that may appear, and provide support or trellising for taller plants as required.
Maintaining and Amending the Soil
To ensure the long-term health and productivity of your raised bed, it’s essential to regularly maintain and amend the soil. Consider the following practices:
Regularly Monitoring Soil Moisture Levels
Check the soil moisture regularly by inserting your finger into the soil. If it feels dry down to a depth of 1-2 inches, it’s time to water. Avoid overwatering, as it can lead to root rot and other issues.
Fertilizing and Amending the Soil When Needed
Regularly fertilize your raised bed to replenish essential nutrients that may have been depleted over time. Use organic fertilizers or compost to improve soil fertility naturally. Additionally, if you notice specific nutrient deficiencies, amend the soil accordingly based on the needs of your plants.
Rotating Crops and Practicing Crop Rotation
To prevent soil depletion and minimize the risk of diseases and pests, practice crop rotation in your raised bed. Alternate the types of plants you grow each season and avoid planting similar plants in the same location year after year.
Managing Pests and Diseases
Keep an eye out for any signs of pests or diseases in your raised bed. Monitor your plants regularly and take immediate action if any issues arise. Consider using organic pest control methods to minimize potential harm to beneficial insects and wildlife.
Harvesting and Aftercare
Once your plants have matured and produced a bountiful harvest, it’s time to enjoy the fruits of your labor. Follow these guidelines for harvesting and aftercare:
Knowing the Right Time to Harvest Vegetables
Research the specific harvest times for the vegetables or fruits you are growing in your raised bed. Different plants have different ripening periods, and harvesting at the right time ensures the best flavor and nutritional value.
Proper Techniques for Harvesting
Use proper techniques when harvesting your produce to prevent damage to the plants. Use clean and sharp tools, such as pruners or scissors, to cut vegetables or fruits from the plants gently.
Cleaning and Storing Harvested Produce
After harvesting, clean your produce thoroughly to remove any dirt or debris. Store it in a cool and dry place or refrigerate depending on the specific requirements of the vegetables or fruits. Proper storage helps extend the shelf life and maintains the quality of your harvest.
Preparing the Raised Bed for the Next Planting Season
Once you have harvested your plants, it’s time to prepare the raised bed for the next planting season. Remove any remaining plant debris, loosen the soil, and top it up with compost or organic matter. This will replenish the soil’s nutrients and ensure that it is ready for future plantings.
As you embark on your raised bed gardening journey, it’s important to be mindful of some common mistakes to avoid.
Common Mistakes to Avoid
When filling a raised bed with soil, be sure to avoid the following mistakes:
Overfilling the Raised Bed with Soil
Filling your raised bed with an excessive amount of soil can lead to drainage issues and waterlogged roots. Stick to the recommended depth and ensure proper aeration and drainage in your raised bed.
Using Poor Quality or Contaminated Soil
Using low-quality soil or soil contaminated with chemicals or pollutants can negatively impact the health and productivity of your plants. Choose high-quality soil from trusted sources or opt for organic gardening practices.
Not Providing Proper Drainage
Ensure that your raised bed has proper drainage to prevent water accumulation and root rot. Incorporate materials like gravel or sand at the base of your raised bed to aid in drainage.
Neglecting Weed Prevention and Control
Weeds can quickly overtake your raised bed and compete with your plants for nutrients and space. Be diligent in preventing and removing weeds regularly to maintain a healthy growing environment.
To ensure your success in filling a raised bed with soil, consider the following tips:
Tips for Successful Soil Filling
Seeking Expert Advice and Guidance
If you are new to raised bed gardening or have specific questions or concerns, don’t hesitate to seek expert advice from local garden centers, horticulturists, or experienced gardeners. They can provide valuable insights and guidance based on your specific needs.
Testing the Soil for Nutrient Levels and pH
Before filling your raised bed, consider conducting a soil test to determine its nutrient levels and pH. This will help you make informed decisions about soil amendments and ensure that your plants receive the necessary nutrients for optimal growth.
Using Raised Bed Kits or Frames for Convenience
If you prefer a convenient and hassle-free raised bed gardening experience, consider using raised bed kits or frames. These pre-made structures are designed to simplify the process of filling and maintaining a raised bed.
Utilizing Companion Planting Strategies
Companion planting involves planting compatible plants together to benefit from their natural pest-repellent or nutrient-sharing properties. Research companion planting strategies and incorporate them into your raised bed to enhance plant health and productivity.
Conclusion
Filling a raised bed with soil for gardening is a crucial step in creating a healthy and productive growing environment. By following the proper techniques and considering important factors such as sunlight exposure, water source accessibility, and soil quality, you can ensure that your plants thrive and yield abundant harvests.
Remember to choose the right materials, prepare the bed adequately, and maintain the soil quality to enjoy the benefits of gardening in raised beds. With dedication and care, your raised bed garden will provide you with an abundant and satisfying harvest year after year. Happy gardening!